One big reason I include a complimentary Engagement Session with most of my packages is because it really is a wonderful way to get to know my couples better before their wedding. Every photographer is different, but for me, the more I know about you, the more connected I will feel to you and the more information I will have in my mind to work with on the day of the wedding. What that translates to is a better product in the end, and richer, more meaningful imagery.
Wedding photography is a very personal and artistic process for me. After I graduated from college I started working for a large local photo studio, who was very much treating their business as a commercial chain. There was no connection with their clients, and no passion being injected into the product. It was sterile. Show up, shoot, mass edit, repeat. That felt incredibly empty and depressing to me. Photography was one of the few things in life I’d done that made me feel creative, engaged, and like what I brought to it mattered, and yet I found there was a way to strip it of that. I realized very quickly that this particular path wasn’t for me, and that’s when I decided to take the leap and venture out on my own.
Whatever photographer you end up working with for your wedding day, I would say trust them. If you like the work you saw on their website, let them lead you through their process because that’s how you’ll get those results. If you’re coming to me after you’ve already done an engagement session with someone else, I’d urge you to still take advantage of the one I’m offering. The way I direct you will be different from the way the other photographer directed you. It gives us both an opportunity for a trial session before the big day, and we’ll both be more comfortable (and hey, more pretty photos can’t be a bad thing, right?) Plus here’s a bonus, if you get your hair and/or makeup trial on that day, you’ll get a sneak peak of how those look in photos.
Now let’s get to the meat of it! What happens during an engagement session? How long does it take? What do I wear? What else do I need to know? No worries boo, I got you. Ready for a lot of info and a whole lot of GIF action? Below is a checklist + some advice from me to ensure you get the most out of your session.
1. Location, Location, Location
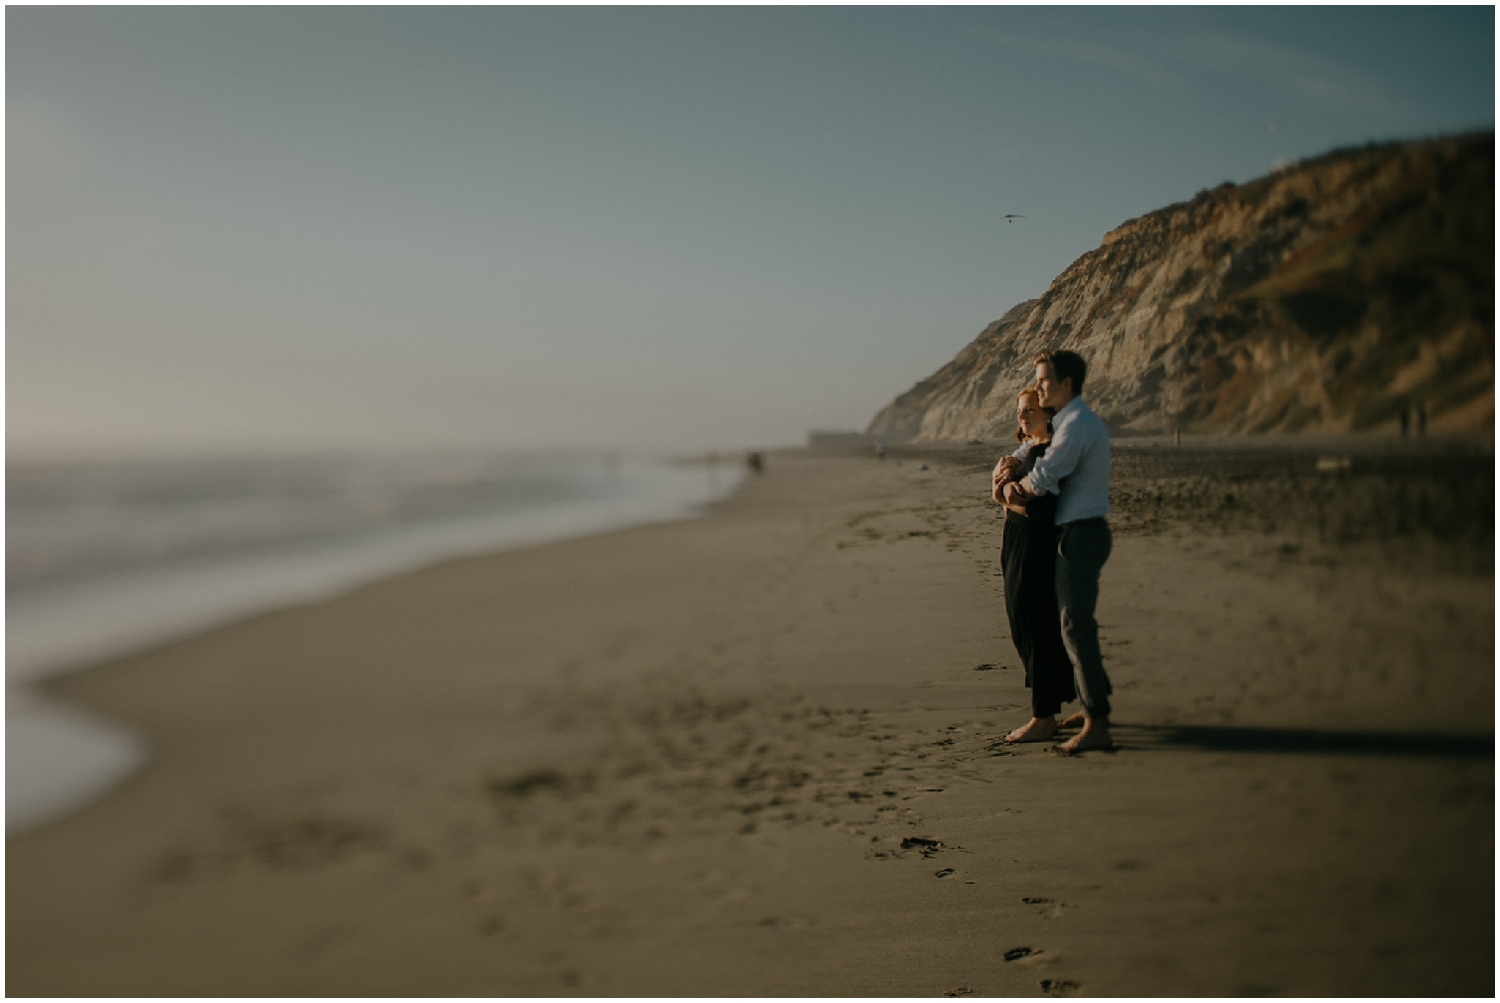
The first thing to figure out is what kind of scenery you want as your backdrop. Every photographer and every couple is different, so definitely communicate the kind of mood you’re hoping for. Personally, I tend to favor wild, natural spots. Nothing too manicured or “perfect,” nothing too touristy or busy. I love shooting outdoors (the wind is our friend) and I love featuring nature. For this reason (and I’m not kidding) you can take me anywhere in the world. Think of the coolest spot you can think of, and know that I’m game to go. Iceland? Ireland? Horseshoe Bend? We can stay local or fly across the world, but either way I’ll be excited to create something truly unique with you.
> Things to Look For: Large natural areas, beautiful vistas, trees, mountains, oceans, rivers, lakes. Also look for things to add visual interest and that can be something for you to interact with: big rocks to climb, wild flowers to run your hands through, wind to play with your hair & clothes, water to splash through… Variety (the more visual variety a spot offers us, the better!)
> Things to Stay Away From: Lots of people (a couple can be Photoshopped out but large groups or lots of people will alter your image too much to remove and it won’t look natural.) Houses, cars, street signs, graffiti (unless we’re full on doing an urban shoot & embracing that, then stay away from it. It’s all or nothing with that stuff!)
Talk to me during this process, so I can help guide your decision. If staying locally, start to look at big national parks, small nature preserves, forests, fields and beaches. Keep in mind that some require a permit, so inquire with the location’s city ahead of time so you can find out whether one is required, how much it is, how to get it and how long it takes.
Don’t wanna bother with any of that and would rather be photographed in your natural element? We can absolutely do an at-home session. Picture you and your lovey, some cozy (cute) clothes and rolling around on the bed being adorable. (As much as I’d love to I won’t be rolling around with you, though if you have a cat or a dog, I make no promises.)
2. Choosing a Date
One might think that we can get this done at any time of year, but you’ll have to consider the type of landscape you’re hoping for. With a few exceptions that stay the same year-round (such as Florida,) things are going to change with the seasons. Are you hoping for lots of flowers? Then the middle of winter isn’t the time to do it. Want the fall colors? Snow? Consider this as you work out the best time to schedule your session, and make sure to communicate with your photographer to ensure she/he is available during that time. If you’re traveling for this and aren’t sure what things might look like at the desired time of year, then a simple Google search can be a good place to start.
Are you planning to use some of the images for your Save-the-Dates? Think about when you’re hoping to mail those out, consider your photographer’s turn-around time, and add a buffer. What else should you know about scheduling? Again each photographer is different, but most don’t do these on the weekends (especially during high season) as they tend to keep those days open for weddings, so it might be a good time to use one of your vacation days.
3. Choosing a Time
Choosing a time will depend on the season during which this is taking place. Summers have longer days and winters much shorter. For example, Chicago’s sunset time in the summer is around 8pm, while in the winter everything is pitch black by 4pm. That will be your first place to start: Google the sunset time for that location at that time of year. From there, take out an hour, because the last hour of “light” isn’t really usable (there’s still technically daylight but it’s very dark.) From there, move back the amount of time your photographer says she/he will need. For me it’s a minimum of 2 hours if we’re not covering a lot of ground, and more like 3-5 if we’ll be hiking around to different spots. That should be when we start shooting. Work backwards from there and add driving & hiking time to the location, then add a buffer (in case of traffic, getting lost…) Now you should have an estimated meeting time, getting on the road time, start time and end time. Here’s an example:
– Sunset is a 8pm
– We should be done shooting by 7pm
– We should start shooting by 3pm
– There is a half hour hike and an hour drive to get to the spot, so we should meet by 1pm
What other factors are there? Of course if you want the sunrise to be in your photos, then that changes the schedule. Human-Me will always hate getting up to shoot at sunrise, but Photographer-Me will always adore it. I might look cranky pre-coffee but trust me, it’s worth it 😉
What about the kind of light? That’s the big dorky topic you always hear photographers talk about. You might think: “There are different kinds of light? What is good light?” This again depends on the intended results, so talk to your photographer about which session of theirs you saw and liked and they’ll be able to advise you on when to do this. Believe it or not, different places in the world (even in the same country!) have VERY different lights that give you very different raw images to work with. Not only that, but the same place at different seasons will also throw you a curve ball and change the light quality on you. But generally speaking, this is what we’ve got to work with:
– Sunrise: Very brief window of bright, energetic, orange/yellow light
– Morning: Bright, relatively even light
– High-Noon & Mid-day: Very bright light with harsh shadows. This time typically does not give you moody images.
– Late afternoon: Softer, more even light
– Sunset/Golden Hour: Very brief window of soft, rich, golden orange light
– Blue Hour: Right after sunset and before dark, very brief window of blue-ish, low light
– Overcast: Duller, softer, more even light (no harsh shadows.) This will give your images a moodier, more dramatic feel.
But you don’t need to worry about all this. Communicate your desires with your photographer and she/he will be able to guide you.
4. What Should I Wear? What Should My Partner Wear? What About Hair & Make-Up?
You can get a good idea of what to wear based on your chosen photographer’s past work, so go through their blog to get inspired. For me, I love to go a step above your average wear, but a step below SUPER dressed up. To get more specific, my work doesn’t really feature 5-inch stilettos, mini dresses and done up hair because that’s not really the kind of client I attract nor the kind of mood I like to create. Still, you also don’t want to wear sweat pants and a flannel shirt.
Two looks that work well in engagement photos are 1) Dressed up & romantic, and 2) Casual & trendy/edgy. These can be interpreted in vastly differently by different people, so let me explain what I mean:
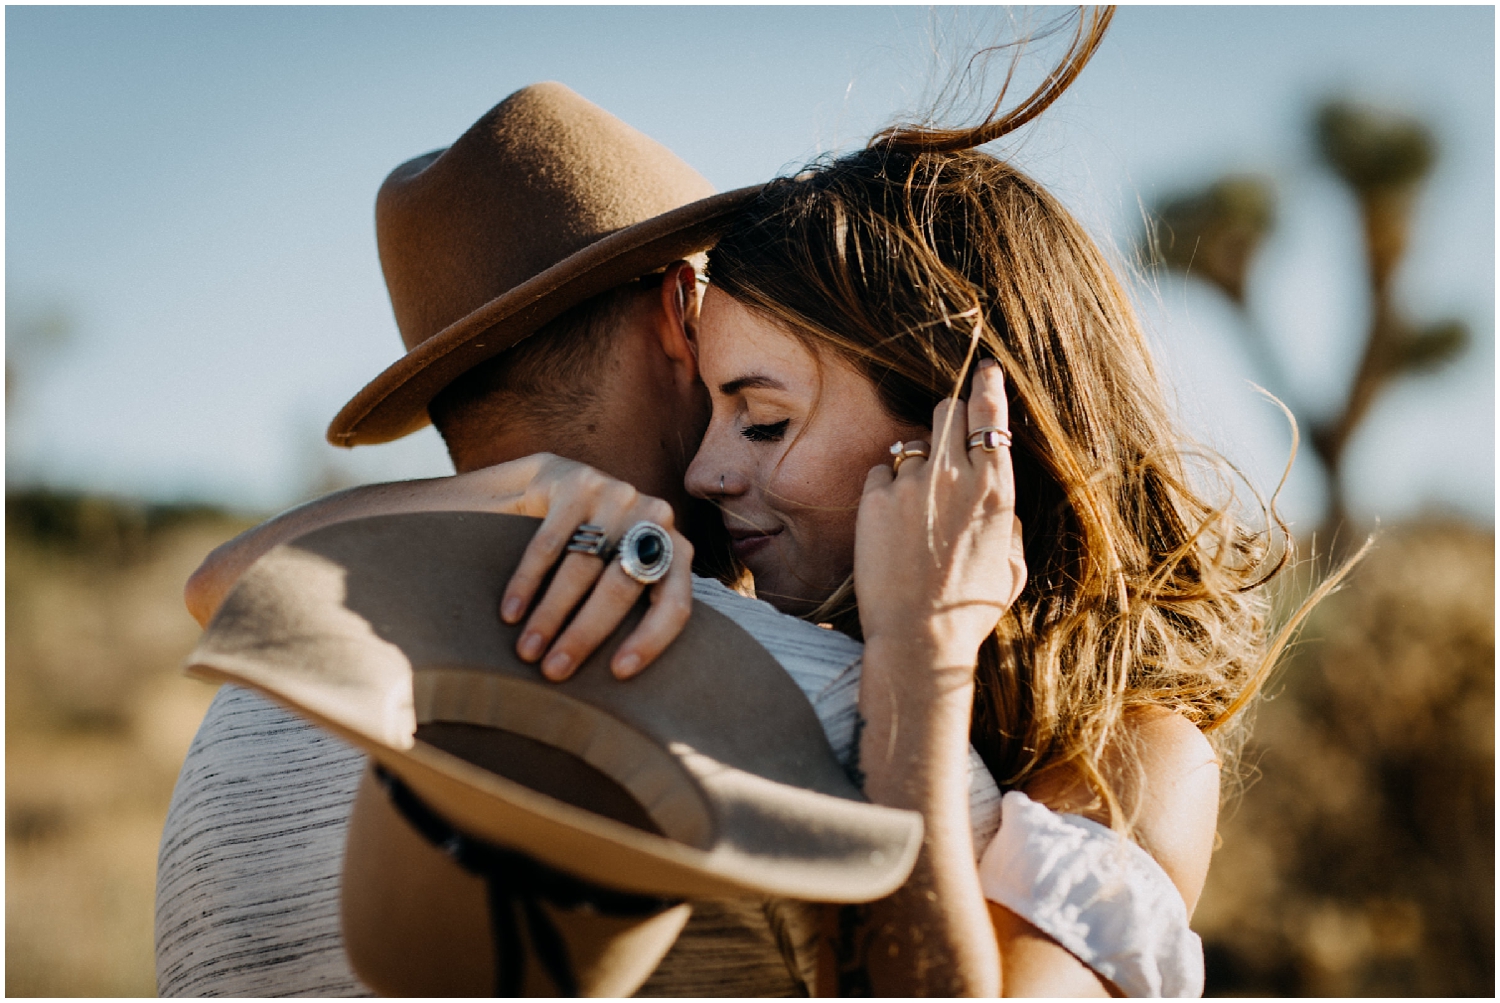
– If you’re going with a dressed up look, the key words to think about are: Nature, romantic, soft, in love, tenderness.
– If you find yourself to be a little trendier and aren’t feeling the dressy style, pick clothes that are casual but stylish. Key words to think about are: fun, explore, wild, passion, wanderlust.

> LADIES
For the dressy look for ladies, I love love love to put you in flowy dresses! It gives the wind the opportunity to pick up the fabric and give your image movement. It’s romantic, visually interesting, and gives you something to do/play with. I suggest going with a maxi dress (more fabric = more movement.) When you choose it, pick one with a lot of fabric in the skirt. If you don’t see a lot of folds in the photo, then it doesn’t have a lot of fabric and there won’t be much for the wind to interact with. Make sure it is fitted at the waist, so you can have a more defined silhouette (you don’t want to look like a shapeless sack of potatoes.) If your religion or personal preference leans on the more modest side, there are a lot of models that cover the back, arms, and have a higher neckline. For the more casual look keep it simple but stylish: denim, a cute top with personality, and some cool earrings or a hat.
Shoes are less important in the dressy scenario because they won’t really be seen. You can wear sandals or your hiking boots underneath and frankly, you might end up barefoot lol. For the trendy version, simple tennis shoes or cute leather booties can tie the look together nicely. Your hair and make-up definitely don’t need to be professionally done. Do wash it beforehand so it looks clean, but then leave it down for this. (Wild hair + wind = loooove.) If you want, maybe do a soft wave with it. Do wear make-up, it will make you feel more beautiful and confident, and confidence always looks gorgeous! But don’t overdo it. Unless Pin-Up makeup is part of your look, going too heavy on the makeup won’t look like you. No need for false eyelashes and fake nails, just your natural beauty boosted up with a little pop of makeup will do the trick.
My Suggestions: I always suggest muted & natural tones when choosing your outfit. For dresses, Lulu’s in my absolute favorite and my go-to. They have a large inventory with tons of colors. Many of the dresses are extremely flowy, and most have fabric of very good quality. With the exception of a couple, I have been pleasantly surprised with what I have seen so far and have purchased quite a few specifically for shoots. They tend to be on the pricey side, but you can get good deals if you catch a sale. If you’re on a budget or in a pinch time-wise, Amazon usually has a few decent options. It’s a bit more hit-or-miss with it but shipping is fast and returns are easy. For the more casual option, I recommend Madewell.
What to Avoid: Loud prints, wording, brand names, and harsh/too bright/neon colors. A very small or very soft print can work, but if the print is large, or the color of it very bold compared to the rest of the dress color, it will look very distracting in your images. Same thing with any kind of wording or obvious brand name/symbol. Those things are overlooked in real life, but in a photo they become all you can see and steal the show (next thing you know you look like an advertisement for that brand.) When choosing your outfit, go for colors that don’t make sweat obvious, especially if it’ll be hot (that can’t be Photoshopped.) Have clean nails! No need for a professional manicure, just make sure you don’t have chipped fingernail (it becomes obvious in photos.) Again it depends your photographer, your personal preferences and what kind of image you’re looking to create, but personally I would say avoid anything over the top or too done up: Big heels, false eyelashes, long fake nails, a lot of jewelry and putting on too much makeup. We’re looking for natural beauty 😉

> GENTLEMEN
For my male subjects, think dressed-up casual and beyond. Some pants that work are fitted jeans or a stylish pant. For a more casual yet dressy look you can wear a button-down shirt with the sleeves rolled up. Dress it up a bit by adding a blazer. Dress it up some more with a tie/bowtie. Wear a nice Oxford shoe or a dressed up sneaker. Wanna really go for it? Rock a suit! Feeling fashion forward and avant-guarde? Pick one item to be colorful or to rock a pattern. I’d limit it to one, so it can really stand out. If you wear too many things that fight for attention it will look too busy. The best item to have fun with is a tie!
However, if the dressed up look really isn’t you, then go for the more casual one. But guys! This is not a pass to show up in your sweats! If you’re gonna go casual it has to be stylish and done with purpose (I’m gonna hold you to it!) An example would be denim, a t-shirt, a leather jacket and boots. Or a colored khaki pant, t-shirt, denim jacket and tennis shoes. Nothing too crazy is required when it come to your hair & facial hair as long as it looks clean and tidy. Wash your hair so it doesn’t look greasy, and style it with a bit of balm. If you have a bear, clean up the neck and I hear beard cream makes a huge difference!
My Suggestions: For inspiration you can always turn to Banana Republic or J.Crew. The clothes are stylish and well-fitted, making the subjects look chic and put together. Both are on the pricier side but have good sales (especially Banana!) Still out of budget? Both have a “Factory” store. Same great styles with slightly lesser fabric. It won’t last you as long but as a short-term solution on a budget, it’s perfect. (Banana Republic Factory / J.Crew Factory.) I advise keeping most of your outfit in the neutral tones, those look good on everyone!
What to Avoid: As with the ladies, I would avoid too bold a print, any wording or obvious branding, shirts with designs, and harsh/too bright/neon colors. If you do want to wear a daring item, limit it to one. Too many bold items might be distracting and potentially look silly. Go for well-fitted clothing and stay away from baggy items (they will make you look bigger, shorter, and frumpier.) No cargo shorts/pants with tons of pockets, no dirty sneakers, and no t-shirts with a super hero on it (Sorry, it’s just not the day lol.) When choosing your shirt, go for colors that don’t make sweat obvious, especially if it’ll be hot (that can’t be Photoshopped.) Take a shower & do some grooming! A lot of guys aren’t really into it, and while there’s no need to go get a razor shave for this, you also don’t want to look unkempt. Come on admit it, you wanna look sexy too…
> MAKE IT PERSONAL
These are just meant as general guidelines to help guide you with your choices and steer you away from what I know can be an eyesore. So how do you figure out which look you should go with? Look at the keywords I listed and see which resonates more with you as a couple (and both go with that option, meaning you either both go the dressy route or both go the casual route.) And make it personal! Got any sweet tattoos? Let’s show ’em off! I want these photos to look & feel like you. Can we just agree to stay away from the beige khaki pant/white shirt combo lol?

5. What to Bring
My engagement sessions tend to be on the adventurous side! So think ahead about all the practical aspects of the day and plan accordingly. Here is a list of things to think about/bring:
> ALL SHOOTS
– Photo permits: If you’ve had to purchase a permit to use the location, don’t forget it! If I were you I’d save the web version on your phone & leave a printed version in your car.
– Food & water: We’ll be out for a few hours shooting + driving to and from the location, so make sure to have enough water to keep you hydrated (bring extra in the summer) and snacks/cereal bars to keep your blood sugar from crashing.
– Medications + Bandaids/First aid kit: I’m prone to migraines (and they can really ruin a day) so I always have Excedrin on me. Of course I don’t foresee any issues but you never know. Think Dramamine if you get car sick, Advil for pain, bandaids & Neosporin for cuts & blisters + whatever medication is specific to you.
– Hiking/comfy shoes: The shoes you’ll wear in the photos likely won’t be the ones you should wear walking to the shooting site. You want to be comfortable, safe, and not get blisters!
– Comfy clothes: You’ll be dressed up for the photos but you want to be comfortable during the drive and hike to the spot. Plus if you get wet, you’ll want fresh clothes to change into for the drive home.
– Environmental protections: While I have yet to be put in that position myself, I know some areas have animal & environmental dangers against which you can get protection (e.g. bear repellent! I know, I thought it was crazy too!) So make sure to research what could be dangerous to the area & be prepared!
– Your ID/passport: Never be caught without your ID! Even if you’re not the one driving. And if we’re driving from say, Seattle to Vancouver, it won’t even feel like we’re leaving the country but we are! (Sounds silly, I know.)
– Highway pass: If you have a highway speed pass, bring it!
– Cash: For highway tolls if you don’t have a pass, park entry, and just in case of emergency.
– An umbrella: In case of light/medium rain.
– Extra phone battery: Have you ever seen the show I Shouldn’t Be Alive? Okay. We’ll be out in nature for a few hours and I don’t wanna die falling off a cliff, through a bee hive, into a volcano and onto an angry bear. We need cell power, y’all.
– A flashlight: It’s very unlikely we’ll need it, but just in case we are still hiking when it gets dark & our cell phones are out of juice, this simple thing can make the different between finding our way back to the car or ending up on an episode of I Shouldn’t Be Alive (I know, I keep talking about it, but like really, watch it, it’s both scary & awesome.)
> SUMMER SHOOTS
– Extra water: I know I’ve already said it, but it’s summer. So no, really, bring more water.
– Sunscreen: Sun burns aren’t fun and neither is skin cancer. Don’t forget your sun block!
– Hat: Depending on where we are, bring a hat to avoid a sun stroke.
– Bug repellent: It’s summer and humid, so don’t forget mosquito spray/wipes. Think about other kinds of bugs as well (ticks…) and bring whatever you need to protect yourself again those.
– A hand towel: To clean your feet of dirt/sand before getting back in the car if you end up barefoot during the shoot.
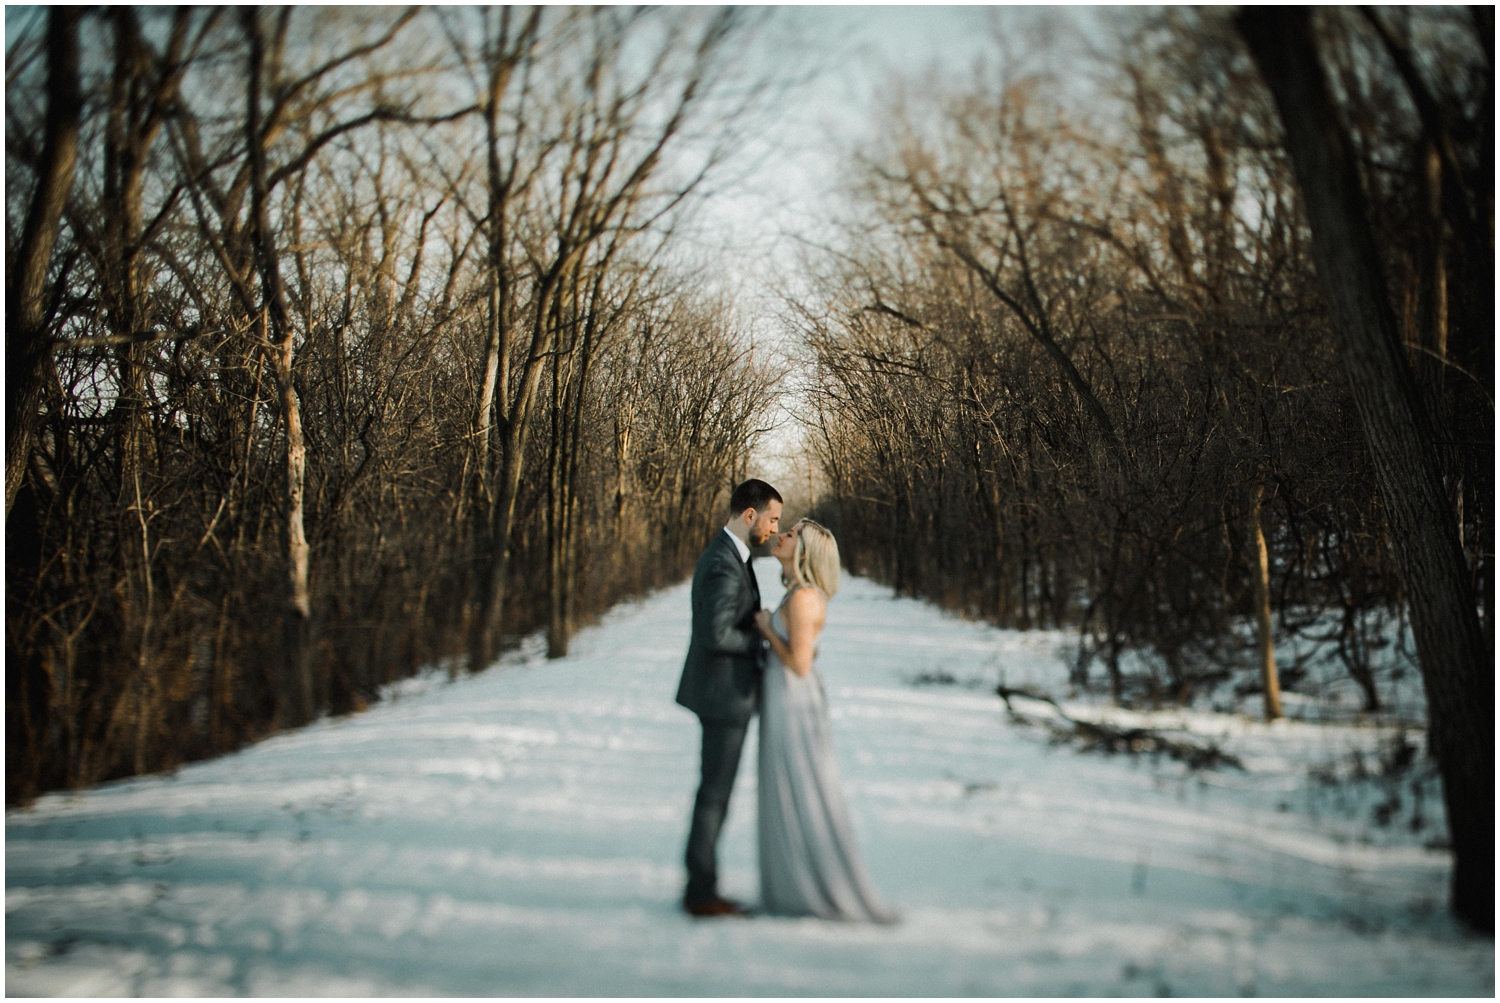
> WINTER SHOOTS
– Leggings + Socks: Ladies, if we’re shooting you in a dress in the middle of winter (it’s been done lol) you’ll want to wear warm leggings & socks underneath.
– Coats, hats, gloves: I want you to be able to take breaks and warm up, so even if you’re not being photographed in your coat, hat & gloves, don’t leave them behind!
– A pretty blanket or throw: It’ll be super cute to cozy up with for photos and an extra way to warm up in between.
– Hand warmers: Get a few of those hand-warmer packs, they’re a life-saver. You can find them just about anywhere (Target, Walgreens, Amazon, sporting goods store…)
– Extra socks: So you can have warm, dry feet afterwards. You’re welcome.
– Tissues: For your runny nose.
What Can I Expect?
In terms of my approach to the day, it’s very laid back. I don’t advise you do this on a day when you are stressed, rushed, or have a lot to do before or after. Actually I suggest you make a day of it! Sleep in so you’re well rested, have a nice lunch together, then meet up with me, shoot, and maybe go out to dinner after or have a cozy night in and order take out. The key to creating these timeless, intimate images is for us to have time and for you to be in the right head space.
> THE PROCESS
In terms of what to expect, it’s not an intense photo shoot where you’re changing your pose rapid-fire like a model and where I’m constantly clicking the shutter, shouting “Yes! YES! Make love to the camera!” lol. It’s really low key and like hanging out with friends. I’ll bring music, we’ll walk & talk, shoot a little, take some breaks, then keep going. We’ll want to hike around so we can get some variety in terms of location/backdrop. You’re welcome to bring a second outfit to shoot with but don’t have to, one works just fine. And we’ll drive to it together! It’ll give us a chance to chat & gets rid of all the time wasted trying to find each other once you get there (why do parks have 17 entrances??!!)
> HOW MUCH TIME WILL IT TAKE
When we feel we’re done (or when we run out of light) is when we’re done! Usually it takes a minimum of 2 hours when we’re not covering a lot of ground, and 3-5 hours if we’re in a big national park (depending on how much hiking/how many locations we cover.) Know that we can get lost on the way there, trying to find the exact location (it’s happened lol) and that’s okay. Build in some time for that just in case. Thankfully we are past the time of having to print directions from Mapquest, so we should be okay. And if we don’t find the exact spot, it’s not the end of the world! We’ll roll with the punches & make another one work.
> WE’RE GONNA GET A LITTLE DIRTY
Know that while I’ll be looking professional on your wedding day, I won’t be looking so for this session lol. This is nature and I’m likely to roll around in the dirt to get the shot, so please forgive the Toms shoes, leggings and old t-shirt. On that note, don’t wear anything too valuable to you. We might get wet and we’ll definitely get a little dirty, so if it would upset you to have something get a little roughed up, don’t wear it!
> WHAT IF IT RAINS?
That’s okay! Unless you are really opposed to it, know that I am not (that I’ve done it before and that my gear will be fine.) Unless it’s a monsoon outside (which wouldn’t work because it would be hard to see you and the camera would have a hard time focusing) then I actually kinda secretly hope for rain. I love it! It’s so moody & dramatic! And I love how stormy skies look.
> CAN WE BRING OUR PET?
I’m a big animal lover and pets are always welcome, but know that this is going to be a long day and having your fur-baby around would make you switch into “parent mode” instead of “lovebird mode.” They’ll want to run around, they’ll want to play, and you’ll worry about him/her instead of feeling care-free, so this might not be the best day to include them. If you absolutely want fluffy there though, I’d bring another person along who can watch over them because they likely will be “over” photos pretty fast lol. Also, not all places allow dogs.
> WHAT TO DO BEFORE THE SHOOT
Double check that a natural disaster didn’t change the landscape of where you’re hoping to shoot (like the California wildfires devastating the coast.) Look up the natural dangers for the area where we’ll be shooting and be prepared. Think about environmental factors (falling rocks? Mudslides in case of heavy rain?) Think about animal and insect factors (are there ticks? Bears? Mountain lions?) Find out if a permit is required, and if you are planning on bringing your dog, make sure they are allowed. Also make sure that the place you are hoping to use is open that time of year, and isn’t temporarily closed for any other reason (construction, renovation, natural disaster…) Check if there is an entrance fee and check operating times. Oh, and don’t get sunburned beforehand. Because no, I cannot Photoshop that out lol.
> YOU CAN ALWAYS SAY ‘NO’
Know that anywhere I suggest you go and anything I suggest you do is just that, a suggestion. It’s me thinking artistically, but I always want you to feel safe and comfortable. You could get bit by an insect, for example, or slip and fall. So know that if anything doesn’t feel right to you, speak up and don’t do it!
> LEAVE NO TRACE
I’m a big green, earth-loving hippy so leave no mess behind! Bring a backpack with a plastic bag in it so we can take our trash with us when we go *hugs a tree*
> WHAT IF I’M NOT COMFORTABLE IN FRONT OF THE CAMERA?
I think that makes about a million of us lol. Believe me, I hate being in front of the camera (ironic, I know.) So I’ve actually booked a photographer before so I would know what it felt like to be on your end of things, and see what helps and what doesn’t. Know that there is no right or wrong way (no, really.) Because I’m not trying to make you be something you’re not, but rather trying to capture you two and your connection, you basically can’t do it “wrong.” The way you would naturally hold hands is exactly the way I want you to hold hands. The way you hug is the way I want you to hug. I don’t have a standard way for you to hold each other that I want you to copy. The exact same cue looks completely different couple to couple, and I like that. I’m trying to capture how you two actually are with each other when no one’s around. I won’t “pose” you but rather I will “direct” you. I will guide you through basic actions (e.g. Stand front to front, forehead to forehead and hold each other…) and I want you to act those out the way that comes most natural. From there I might make minute adjustments to get the most out of the frame, to give you the most flattering version of it, but it’s very small and not at all intimidating. The best thing you can do for me and let me see you two together. Allow me to see how you really are together. Allow yourself to relax into it. If you’re nervous, focus on the other person: take a deep breath & close your eye, rock back and forth as you embrace, or look at him/her. Think less about yourself, and more about them. Think back on memories: how you met, a happy moment in your relationship, how they proposed, your favorite thing about them… Focusing on them will help you get out of your own head and get unstuck/be more at ease. Above all, see this as a genuine opportunity to spend some time together. It’s about that first and the camera second.
> WHEN DO WE GET OUR GALLERY?
Typical turn-around time for an engagement gallery is 2-4 weeks. However, know that in the summer/heavy season it will very likely take longer! It’s hard to give an estimate, because it depends on my current work load at that time, but with a lot of weddings to deliver, engagement and other sessions unfortunately get pushed to the bottom of the queue. I of course always want to deliver things quickly to you, but never at the cost of quality and since this is just me, it can take some time. Just ask me after our shoot, I should be able to give you an idea of what to expect 🙂
Are you feeling better prepared? Alright gorgeous, let’s do this.

Need more advice? Check out these posts:
How to Draft Your Wedding Timeline
Setting the Stage to Get the Best Wedding Photos Possible
these are fantastic tips to anyone recently engaged and getting ready to look for an engagement photographer!
Thank you!